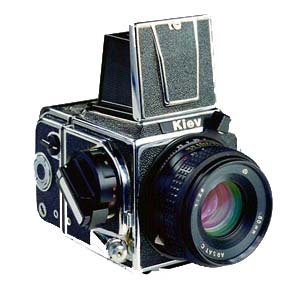
If you are into old-school photography and are shooting black and white, chances are you are processing your own film.
The final step in processing film is to remove all traces of chemicals using during processing. Modern films require much less washing than older films, but one still needs to remove all traces of the “fixer” or “hypo” during the wash. Without proper washing, that roll of film could be ruined by chemical stains later on, making it almost impossible to recover any images on it.
You can wash the film by running water into the developing tank, or use a drop-in film washer built for the purpose.
There are perhaps four types of film washers currently available, most run about 60 to 90 dollars mail-order.
Or you can make one yourself and save money.
The shopping list is small and can be found at any “big box” hardware store.
- 4″ PVC pipe in a 2 foot length – $3.98
- 4″ PVC closet pipe flange with knock-out plug – $6.77
- 4″ PVC “test cap” – $0.83
- 3/8 inch plastic tube fitting (I used one from a hose sprayer adapter from the grocery store), but these can be bought for about $1.00 or so.
Total out the store – about $12.54.
Optional is a jar of PVC cement. I omitted using this because the pipe fitted together quite well and this allows me to make changes to the design or for cleaning.
Start by cutting the PVC pipe to a length of 9 inches, with an optional cut of a ring of PVC material ¾” long (see photos). I used a compound miter saw to make the cuts, making sure the cuts were absolutely square and accurate. If you don’t have such a saw, borrow a friends or ask at the store for help in cutting, as 4″ PVC is quite thick and hard to cut by hand.
To make the simplest washer possible, you can simply attach the PVC pipe to the pipe flange, drill the 3/8″ hole, and attach the tube fitting and start using it. With this option, you will need a spare film reel at the bottom to avoid too much water pressure hitting the fragile film.
I decided to use the test cap to create a platform to rest the film reels on and create turbulence in the water flow. To do this, I used a ¾” piece of the pipe, placed this into the bottom of the flange then drilled a 3/8″ hole for the plastic tube fitting. Then I drilled several large holes into the test cap, and placed it into the remaining 9 inch piece of PVC to form the bottom film reel platform.
Then it was a matter of connecting the wash hose to the new washer and running a test. A small amount of water leaked from the bottom, as I did not glue anything together. This leaking is OK as “Fixer” is a bit heavier than water and this helps the washing process.
To test, I used a drop of red dye in the water, placed 4 film reels into the washer and ran the water at a small rate. The time it took to completely clear the red dye was 6 minutes. Combined with lifting the reels and agitating the water, this wash time could be cut to 4 minutes or less.
I originally built a washer in the mid-1980s, but after several moves this piece of equipment was lost. I researched buying a commercial washer and even on online auction sites, they’re still more expensive the buy than to make.


